Preparing To Grow Wild Plant Seeds
Growing wild plants seed is one of the most fulfilling experiences one can have as a naturalist or native plant enthusiast. There's nothing more satisfying than looking at a tree or plant years later, knowing you planted it yourself and nurtured it to maturity. Other benefits of growing from seed include adding genetic diversity you your garden, favorable root development of seedlings, and most importantly, cost savings. But before planting, it's important to know a few things about growing from seed in order to get the best success rate. Native and northern plants often have built in mechanisms that prevent them from germinating unless they've been exposed to certain conditions they would be exposed to in nature.
Stratification
Having seeds pass through a cold weather dormancy period is a process is called stratifying. Some plants such as grasses don't require it, but many others do. This dormancy period can range from a couple weeks to a few months, and it needs to simulate a winter so seeds know they've endured the cold and need to "wake up" when it's over. It's probably the most important step in seed preparation, and for plants that require it, it can mean the difference between seeds sprouting or not coming up at all. Most seeds that need stratification require "cold moist stratification". Sowing seeds outdoors in the fall to grow in the spring is the simplest way to give them cold moist stratification naturally. But If you don't plan to direct sow, or need to have control of your timing, stratifying will have to be simulated with these steps:
Cold moist stratification
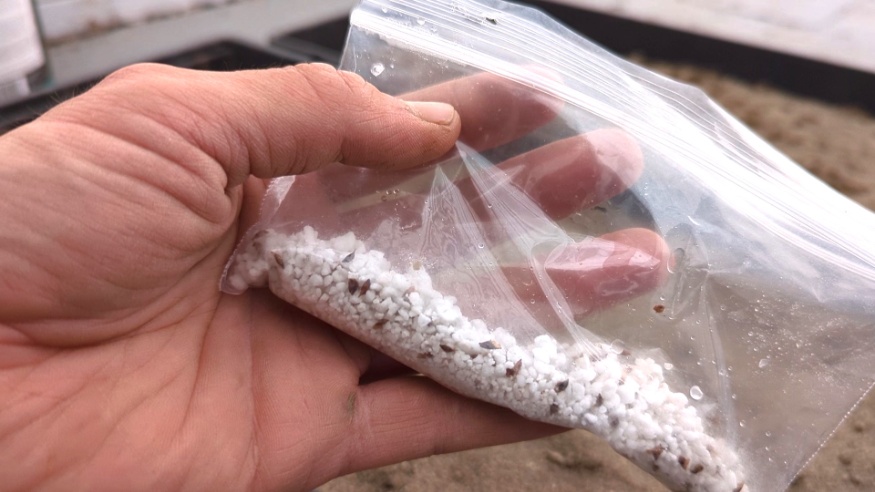
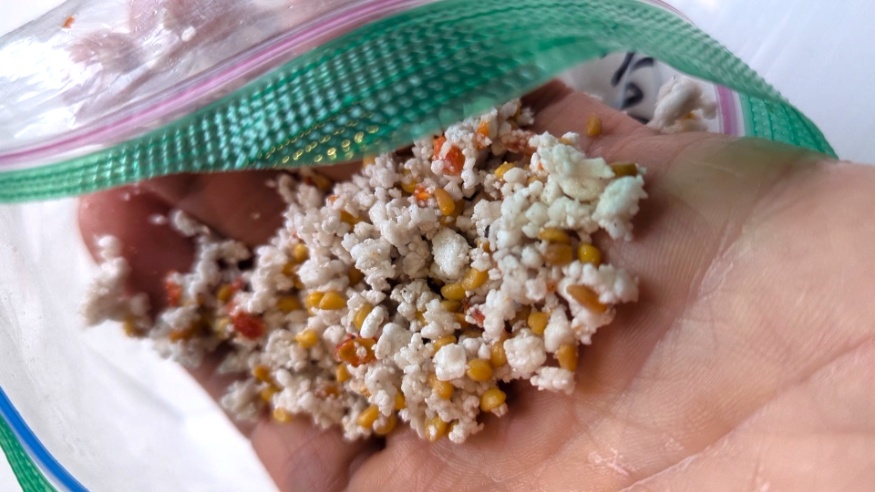
- thoroughly mix seeds with sterile perlite, vermiculite, or potting soil in a ratio of about 50% seed to 50% medium. Perlite works well because it's usually more sterile than soil and you can see the seeds better.
- put the mixture in a ziplock bag and add just enough water to make it moist but not waterlogged. Make sure the water is evenly distributed into the mixture
- Seal and label the bag with the seed name, date it was packaged, and any other information useful to you. Store them in the fridge and check on them every now and then. Give them more water if you notice the mixture is drying out and add more medium if too wet. Watch for signs of sprouting seeds, sometimes they'll germinate right in the fridge. Also Watch out for signs of mold which could happen if there is too much moisture or the medium you use is contaminated. Adding more medium, and spraying it with a 3% hydrogen peroxide solution can help mitigate the issue.
- When finished, plant them immediately. The amount of time seeds need to be kept in the fridge varies between species, some need only a couple of weeks and some need up to 4 months. We find most seeds should have about 3 months in the fridge for good results, but the specific amount of time should be available in the planting instructions for your given species.
Warm Moist Stratification
Some seeds need soil exposure in the warm season before they experience the cold of winter and come up the following spring (unless they have a two year germination cycle). Warm moist stratification involves the same steps as cold moist stratification mentioned above, the only difference being the sealed bag should be left at room temperature for the required time. Simply store the seed-medium mixture in a sealed ziplock bag indoor on a shelf, pantry, or anywhere that stays at room temperature. Most seeds that need warm moist stratification, also need cold moist stratification to follow.
Scarification
Seeds that need scarification often have a thick seed coat as a protection for what their preferred adventure will be in nature. Scarification happens naturally in the wild or it can be simulated. The process involves breaking down the seed coat in some way, by softening it, scratching it, heating it, etc. In nature, some seeds are surrounded by fruit and prefer to be passed through the digestive system of a bird or mammal. The stomach acids weaken their seed coat preparing them to pass through into a nice fertile stool on the ground. A great deal isn't it? Some tree cones need to be exposed to fire (such as a forest fire) before they release their seeds. Some like to be soaked in water (like after a heavy rain). Below are some methods used to soften or thin the seed coats of some that benefit from scarifying:
Soaking
You can soak some seeds for 2 to 24 hours. This helps to penetrate the seed coat and allows it to take in water, often puffing it up and leaching away germination inhibitors.
Boiling water
Pour boiling water over the seeds. Yes! It sounds shocking but they'll be just fine. Use this method for legume family seeds and those with thick coats. Often followed by a 24hour soak.
Abrasion
Scratch or sand down the surface of your seeds by using a file or sand paper, just barely exposing the tender layer underneath. This allows water to reach the insides more easily for water absorption to take place (imbibition). You can also combine the seeds with sand in a jar and shake it or use a tumbler.
Acid
Using hydrogen peroxide or sulphuric acid on seeds simulates the stomach acids animals use to break down seed coats when they ingest fruit and berries. A 3% hydrogen peroxide to water solution is typically used as a soak for fruit seed in particular. It usually takes about 2 to 24 hours, careful not to soak them for too long! When done, be sure to rinse them thoroughly with water.
Once seeds are scarified it's important to either plant them or stratify them (see above). Because their membranes have been exposed they need moisture to either start growing or go dormant. Not all seeds need to be scarified and often it's optional. Usually small, or wildflower seeds do just fine without any scarification.
Seed preparation sounds more complicated than it really is once you try it yourself. Just get to know the species your trying to grow and simulate how it would reproduce in the wild. Every situation is slightly different, depending on your climate, what growing medium you have available, etc. Fortunately there are growing instructions that can be followed so you don't have to do do too much experimentation.